Which One Is The Best Sewing Machine Under 100 of 2020?
Let’s talk with honesty! Buying a good sewing machine can cost you at least $300. The more market will grow on, the costlier your day to day product will be. Will the price rise? No. Technology will help you to crave the latest and finest products. However, if you are the person with the minimum requirement, it can be easier for you to handle the temptation and go for the best sewing machine within your range.
Yet, have you ever thought about buying the best sewing machine under 100 Dollar? Am I joking with you? No, I am not. It is very much possible. And I just have got the proof of it in my hand.
It has been one and a half years since I am using Spiegel SP3201 Sewing Machine. It’s been a while. Still, I am fully satisfied. When I thought of buying a sewing machine with minimum cost and effective results, I had nothing to help me.
You may also like:
I researched buying the product for me, myself. Finally, I bought this particular machine, as it has some features that are very comfortable for me. But hello! I got another four names that can match your taste and be fully affordable. Want to take a look?
5 Best Sewing Machine Under $100 – $500 Reviews:
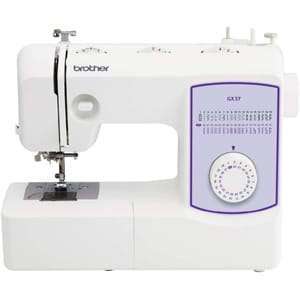
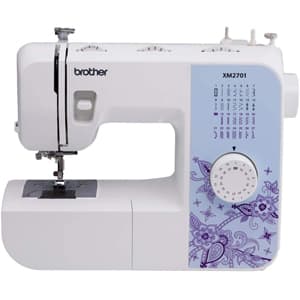
Brother XM2701 Lightweight Machine
Your sewing machine may have so many features to use. Are they very effective? Of course, they are. But all these things will lose value if the sewing machine isn’t a portable one.
Don’t worry at all! Brother XM2701 Lightweight Machine is very lightweight and includes all the features that you may want to enjoy while sewing. Especially, it is one of the best products for the beginners that comes within the budget.
With the 27 built-in stitches, this machine performs in a very versatile manner. The needle threading system is automatic too. So, you don’t have to waste your time anymore!
You will get proper instruction before starting your project with this machine. Wait! Couldn’t you understand enough about this machine’s operation? Brother XM2701 provides a full DVD of its operation too. So, want to grab the product?
Pros:
- Affordable
- 27 built-in stitches
- Pressure feet
- Enough accessories
- Automatic threading system and thread cutter
- Portable
- Contains DVD
- Powerful and quiet
Cons:
- Non-adjustable presser foot
- LED light is not bright
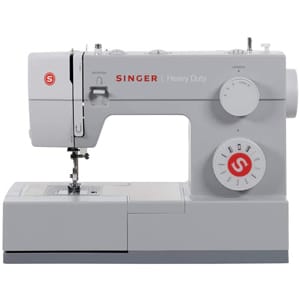
SINGER Start 1304 Sewing Machine
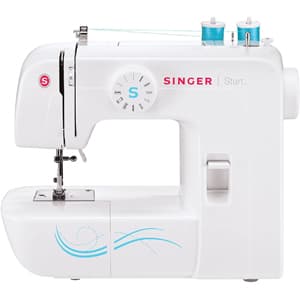
Do you want to start with some basic understanding of sewing within less budget and still want to get the best sewing machine under 100? SINGER Start 1304 definitely can offer you the best service.
And as the machine is coming from a brand like Singer, you don’t have to worry about its durability at all. This machine is not for experienced people. But, if you are trying to get into the realm of sewing, you can pick it for sure.
Though this machine doesn’t have much to offer you, still, Singer has provided 6 built-in stitches (combining many options), buttonholes, extension tables, free arm ability, total three types of pressure feet and so many things more.
With this machine, the threading process becomes easier. Through using all the accessories, you can even work on a heavy-duty metal frame too. Not only the easy selection dial option, but you will also get to enjoy many more features in SINGER Start 1304 too.
Pros:
- 6 built-in stitches
- Affordable
- Easy threading system
- Portable
- Can work on metal frame and thick fabrics
Cons:
- Doesn’t includes much features
- Is not appropriate for the experienced sewers
SINGER 2259 Sewing Machine
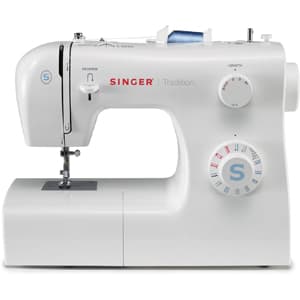
While other brands can provide you so many features and options, Singer is something that conquers the battel with its classy outlook, durability, and perfection.
SINGER 2259 Sewing Machine is the perfect example of that. For the beginners in sewing, this machine comes with both affordability and durability. It is so simple, still, your home will look better arranged with this simple machine.
Free arm and enough storage area- the two things that you search most in your sewing machine, this one provides both of them. Besides, with the 10 watt light, working becomes much easier. If you have a problem with needle threading, the automatic needle threading system of SINGER 2259 Sewing Machine will make it easier for you. As the machine is portable enough, you can move it to any place too.
Its performance is awesome. You will get a lot of accessories with this machine too. And last but not the least, SINGER 2259 Sewing Machine has a total of 19 stitches with so many variations for you. Isn’t that exciting?
Pros:
- 19 variety of stitches
- Portable
- Affordable
- Nice design
- Durable
- Storage area
- Free arm option
- So many features
Cons:
- Front-loading bobbin
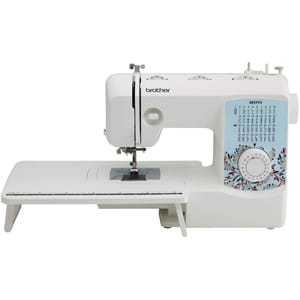
Brother Machine, XM1010
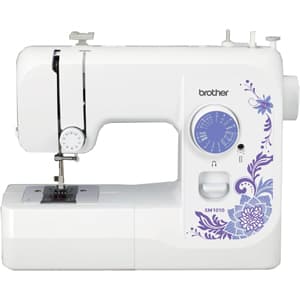
If you are eager to use an electric sewing machine under $100, Brother Machine, XM1010 will do the work pretty fine. It is very easy to use for fresher’s.
You will enjoy a total of 10 built-in stitches in this machine. Seems not something much? Yes, the number of built-in stitches can be less, but it works preferably well in comparison to the budget.
The machine is portable and good for daily use. The daily home works, it will provide you the perfect result. It is really easy to use. Still, for a better understanding, you can take a look at the manual and DVD attached to the package.
Above all, the place that you will work in while using this machine, it will ensure you comfortability the most. So, would you love to enjoy some comfort?
Pros:
- Easy to use
- Affordable
- Portable
- Free arm
- Powerful
Cons:
- Less built-in stitches
- Doesn’t include any auto needle threading system
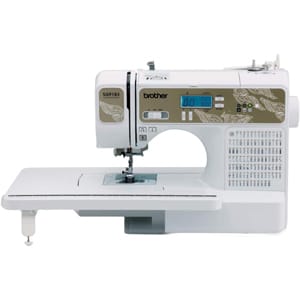
Spiegel SP3201 Sewing Machine
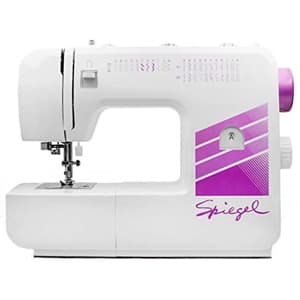
Do you want to enjoy some colors while sewing anything? With the cutest design, Spiegel SP3201 Sewing Machine will provide you that for sure. Leave the colors, this machine includes so many built-in features. You may be a newbie, but you can also want to enjoy different types of features. Spiegel SP3201 Sewing Machine offers the opportunity to you.
It includes a total of 32 stitches of different variations. It includes thread cutter and automatic needle threading system too. And think about the reverse sewing! It is that special kind of feature that helps you through providing the scope to go to the reverse direction while stitching. Isn’t that awesome? You can do that with this affordable sewing machine too.
While offering free arm, it includes LED light, on and off button and so many other features to enjoy! Seems a lot? Then why don’t you buy it?
Pros:
- 32 built-in stitches
- Simple and effective
- Affordable
- Easy to use
Cons:
- Doesn’t include automatic thread cutter
- Not durable enough
Things to Consider Before Choosing the Best Sewing Machine Under 100 dollars
Yes, you are getting a whole active sewing machine with only spending 100 dollars or even less. You may think that you should not question or judge the product much when you are having it at this cheap price. But, I have a very different opinion about it. I won’t even consider spending 1 dollar if the product is not good. So, let’s get a clear view that which things you should check first if you are going to buy a sewing machine under 100 dollars.
Are you satisfied with it?
Satisfaction doesn’t come with money or features. It comes with the need. If you require water and someone provides you a glass of gold, that won’t satisfy you. In this list, some products may have more features. But, do you want them? Maybe not! Just fix your requirements and match them with the product description. Finding the best product will be easier.
Is money seems much?
The sewing machine that is right before you, may cost less than $100. But, the question is, what do you think? Is this money good enough for the product that you are buying? Maybe the money seems less. But, then again, the product can look not justifying the money enough too. That’s your call. Think before you leap!
Have you gone through the reviews?
Not only this sewing machine, have you ever gone through the reviews of the products that you are going to buy? If not, then do now. All the comments of the users, they are very useful and awesome to consider. They may help you to find some of the problems in the machine that you wouldn’t like to have.
Are there enough stitches options?
Yes, the product is costing only $100. But, there are so many sewing machines under $100 that offer even 32 types of stitches. You shouldn’t look for that many varieties. Still, find something that has many decorative stitch options.
Is it compact?
Now, you may question that, why should you look for a compact sewing machine? Because you may need to move it from one place to another. And, compact sewing machine is the only option that provides a lighter feeling. You will be able to enjoy enough portability in these machines.
What more options does it includes?
There are so many things that come with a sewing machine. There is a free arm facility, automatic needle threading system, automatic bobbin system and many more. How much does your machine include? Especially, automatic needle threading system lessens the work a lot more. As you have the option to choose, choose the best one with much use of technology.
Can you control the sewing speed?
Sewing speed manages the stitch pattern. So, to enjoy a quality task out of your sewing machine, find the best one with better speed controlling options.
Does it have enough warranty?
Some sewing machine offers only one or two years of warranty. Some offers for 25 years even. Here actually, the more, the better. So, go for the better warranty options. It will help you to enjoy better service.
Frequently Asked Questions
1. How much money should be good enough for a sewing machine?
Normally, specialists suggest that you should be ready to spend at least $300 to buy a sewing machine. But the actual answer is, if you can find your best interest, you can even enjoy a very appropriate and awesome sewing machine for you under $100 too.
2. Can I buy a Bernina sewing machine?
It is pretty impossible to buy a Bernina sewing machine with $100. Still, you can check your luck. Bernina is one of those brands that are in this business for long and have a family history. They not only ensure quality but also sells their creations at a higher price.
3. How much an embroidery machine can costs?
An embroidery machine can cost you from $500 to $7000. But, there is something that can ensure your some different kinds of embroidery experience while sewing too. Yes, I am talking about a perfect sewing machine with an embroidery option. You can go for them and save your expenditure.
Q4. Which features should I check before buying a sewing machine?
There are several things that you should check before buying one. Blind hem foot, pressure feet, different width feet, buttonhole foot, zipper foot- there are so many things that will make your sewing process easier. So, you should check all of them and find the best one which contains most of these features.
Final Words
Choosing the best one while spending the minimum amount of money, that can be tricky! Whatever you are getting, it is coming cheap, isn’t it? But yet, whether the amount is $1 or $1,000, it’s your money. So, you always should know the product better before spending it on any product. It’s a kind of investment and you won’t like to ruin it, will you?
There is someone of the finest products that I have found so far to buy the best sewing machine under 100 dollars till now.
If you have noticed this article, consider you lucky enough and go through the words. Believe me, the decision that you will make after finishing this article will satisfy you the most!